You can create multiple plans and attach them to your listing types. The plans will appear at your submission process, under the first step, which is the plan selection.
This is the way to limit your visitors submission and make profit from their submisions. Each plan can give you different benefits, like number of submission, listing priority, duration…
How to create a listing plan
Start by going to your admin dashboard, then go to Products Add New. Name your product properly, the plan will be a reflection of the product. Scroll down to Product data, and use the drop-down to change the product type to Listing Plan. You can now set the plan price using the Regular price field.
There are some additional fields that you can see below the regular price:
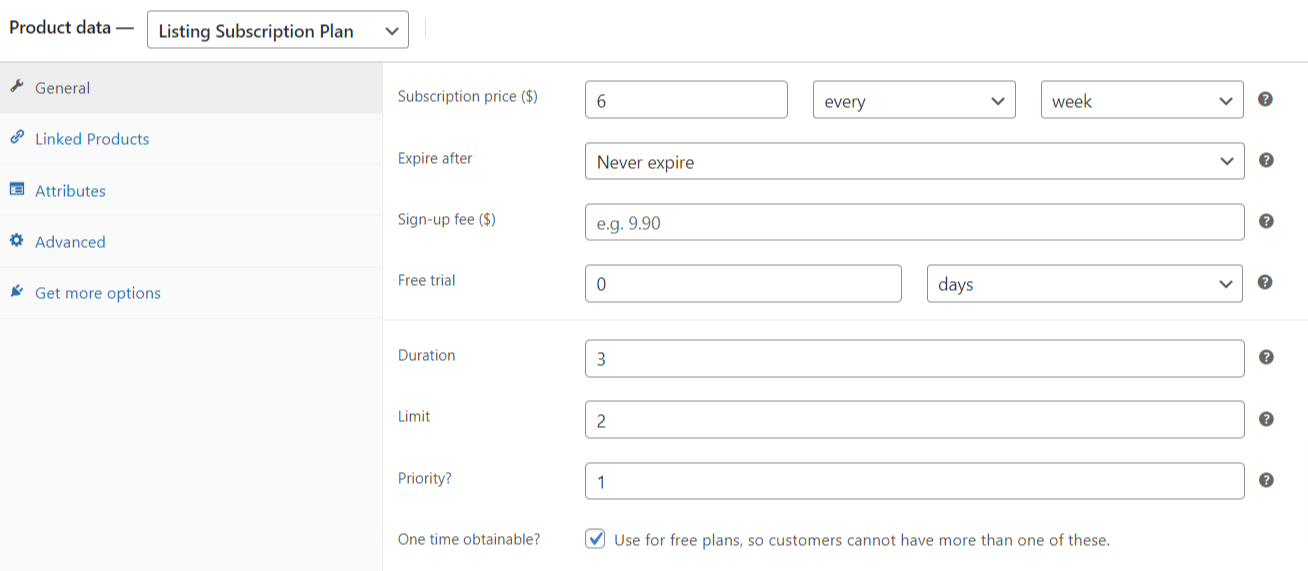
- Duration — The number of days of the listing to be active. Leave empty for unlimited duration.
- Limit — The number of listing submissions that you can have with the selected plan. Leave empty for unlimited submissions.
- Priority — Add additional priority (boost visibility) on the listings submitted with this plan. Higher value means higher priority in search results. Normal = 0, Featured = 1, Promoted = 2 and so on.
- One time obtainable — Use for free plans, so customers cannot have more than one of these.
Assign plans to the listing type?
Now that you have created a new plan, you can assign in to one or more listing types. Navigate to Listing types (edit your listing type) Monetize Plans, mark the option Enable Plans for this listing type, and select the plans you need. Save the changes, and you will see the results in your submission process.
Listing plans with recurring payments
Plan subscriptions are now available through WooCommerce Subscriptions (premium plugin). If you install the plugin, a new product type called Listing Subscription Plan will appear under the product types.
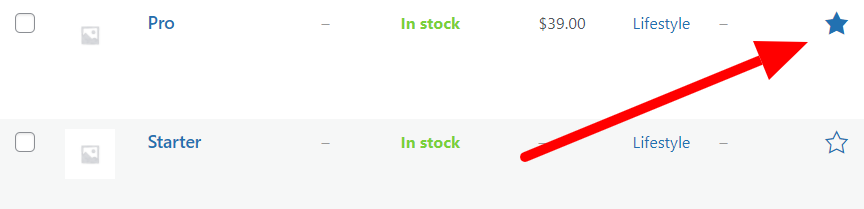
Highlight a plan?
You can highlight specific plan, using the default WooCommerce featured product option:
Obtaining a plan
How exactly the users will obtain the plan? Once they complete the submission process, and if the plan is not free or already obtained, they will be redirected to the checkout page with attached product in their cart. Once paid, the plan will be created.
Please note that a completed order is required in order to process the plan creation, learn more here.
The available plans will also appear in your backend, user Listing Types Plans.
FAQ
How to change the plan sorting — WooCommerce will automatically sort products alphabetically. However, you can also use this setting to create an entirely customized order for your WooCommerce products (plans).
Go to your admin dashboard and navigate to Products, then click on Sorting at the top of your product listings page, you can start customizing your product order.