Promotions is another earning method that allows you to collect payments, it works like a visibility boost. When you promote a specific listing, it will gain higher priority over the other listings.
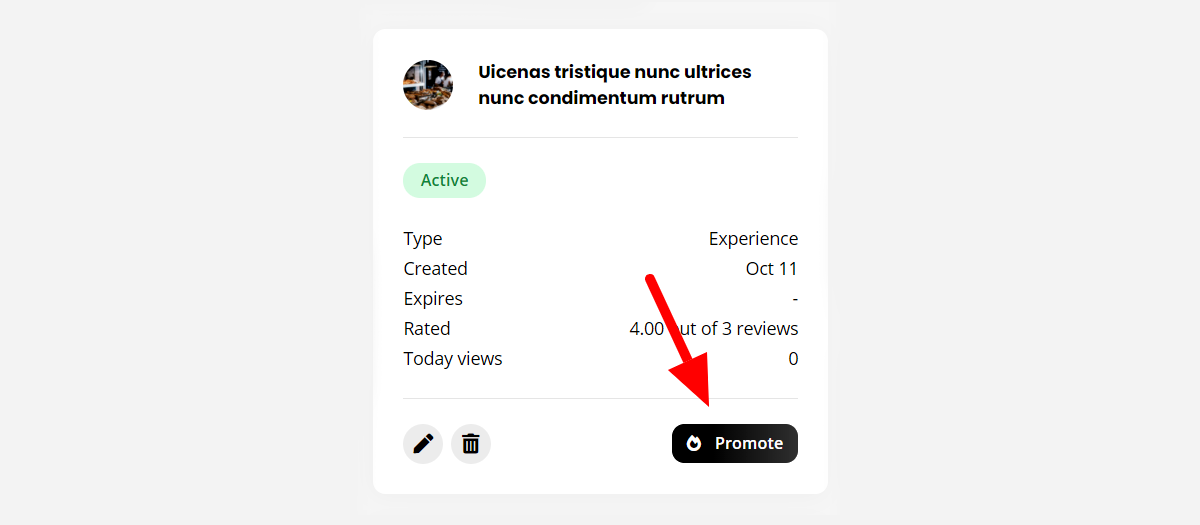
Similar to the plans, you need to create a WooCommerce product and assigned it to one or more listing types. It will appear in the user account listings section, under every active listing as a Promote button.

On click, the button will bring a popup with the available promotions. The payment will be handled through WooCommerce as a standard payment.
How to create a promotion?
Navigate to your admin dashboard, then go to Products Add New, and change the product type from Simple product to Listing Promotion. In the product data, additional fields will appear:
- Duration -—- The number of days of the listing to be promoted.
- Limit -—- Higher value means higher priority in search results.
Don’t forget to set a price and title, then publish the product.
How to assign promotions to the listing type?
Now that you have created a new promotion, you can assign in to one or more listing types. Navigate to Listing types (edit your listing type) Monetize Promotions, mark the option Enable promotions, and check all the promotions you want to attach. Save the changes and done!
How to manage promotions from the backend?
All the promotions will appear in your backend in Listing Types Promotions.
Please note that a completed order is required in order to process the plan creation, learn more here.
Listing priority
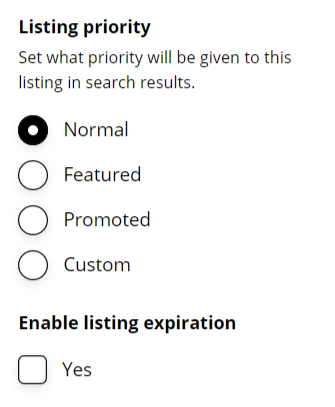
You can edit a specific listing and set the priority level manually. You will see the priority option in the right sidebar:

There are some pre-defined priority levels like Normal, Featured and Promoted. Higher value means higher priority in search results.
- Normal = 0
- Featured = 1
- Promoted = 2
Customize the appearance of the promoted listings
By default, the promoted listings will appear on the top of your list, using the priority number and date of publishing. But in some cases, you may need to change this and display the promoted listings randomly.
You can now change this, by going to Listing Types Settings Explore General Promoted Listings Display.
- Inline – sort promoted listings by priority level and date of publishing
- Random – display promoted listings randomly. This option will ignore the priority level
FAQ
How to change the promotion sorting? -—- WooCommerce will automatically sort products alphabetically. However, you can also use this setting to create an entirely customized order for your WooCommerce products (promotions).
Go to your admin dashboard and navigate to Products, then click on Sorting at the top of your product listings page, you can start customizing your product order.
How to change the listing’s promotion label? -—- If you like to change the priority labels, you can do that by using some simple WordPress filter. Using a child theme, add the following code in your functions.php file:
add_filter('routiz_priority_labels', function($labels) {
    return [
        1 = _x( 'Label for 1st priority', 'priority status', 'routiz' ),
	2 = _x( 'Label for 2nd priority', 'priority status', 'routiz' ),
	3 = _x( 'And so on..', 'priority status', 'routiz' ),
    ];
});