What is a webhook?
A webhook is an API concept that’s growing in popularity. As more and more of what we do on the web can be described by events, webhooks are becoming even more applicable. They’re incredibly useful and a resource-light way to implement event reactions.
So, what exactly is a webhook? A webhook (also called a web callback or HTTP push API) is a way for an app to provide other applications with real-time information. A webhook delivers data to other applications as it happens, meaning you get data immediately.
Why should I use webhooks?
You can build your own process, send SMS / emails / push notifications, collect information, build lists for later use, and a lot more.
A quick video about webhooks and Zapier
How to set up a webhook?
The example below was made with Zapier, but you can use any other platform that allows you to handle webhooks. Some free alternatives are integromat.com
Inside Zapier
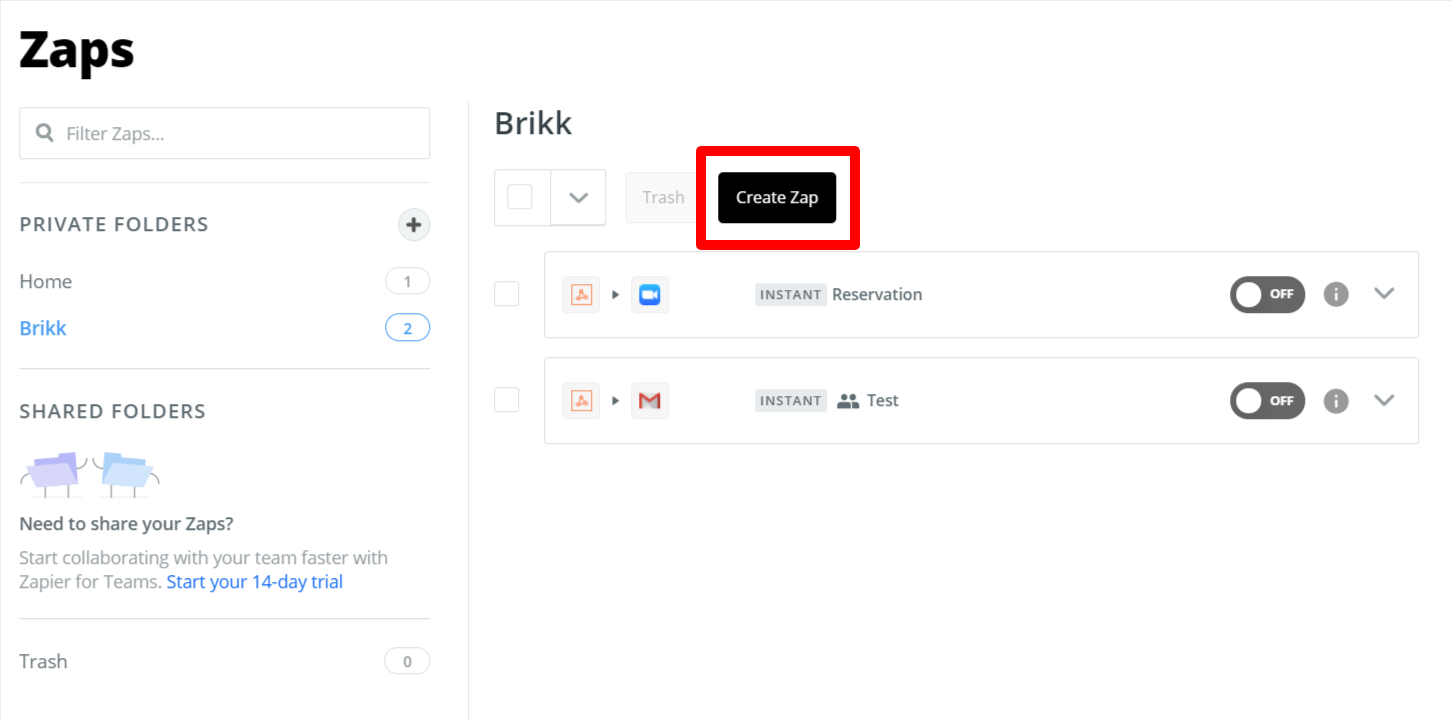
1. Your first step is to create a ‘Zap’ in Zapier. A Zap is a blueprint for a task you want to do over and over. In words, a Zap looks like this: “When I get a new thing in A, do this other thing in B.”
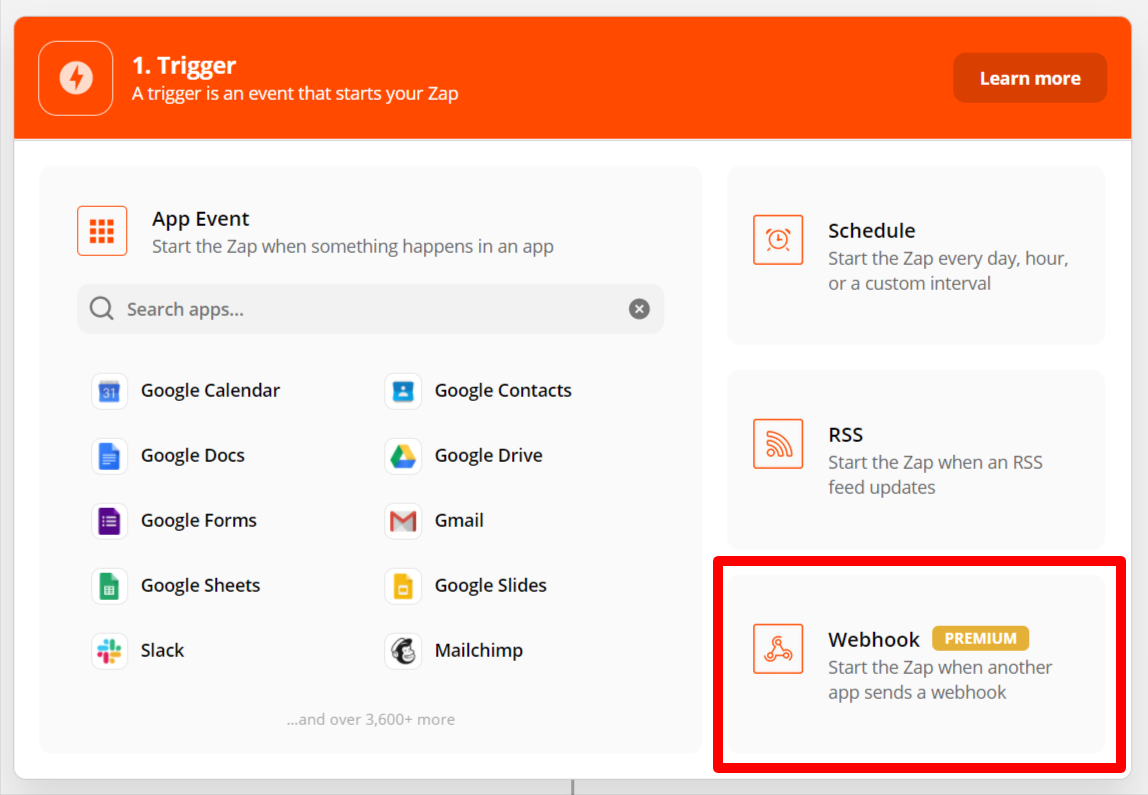
2. Choose Webhook – On the left, you will see all the steps needed to complete the Zap.
3. Choose trigger – On the ‘Select webhooks by Zapier trigger’ screen, choose ‘Catch hook’ and press ‘Save + Continue’

4. Set up trigger – Here you can copy the webhook URL, paste it into your site back-end webhook field and click the button Trigger Webhook. This will send a test call, so you can catch the required fields.

5. Test this step – Copy the Zapier webhook to your clipboard
Inside your configuration
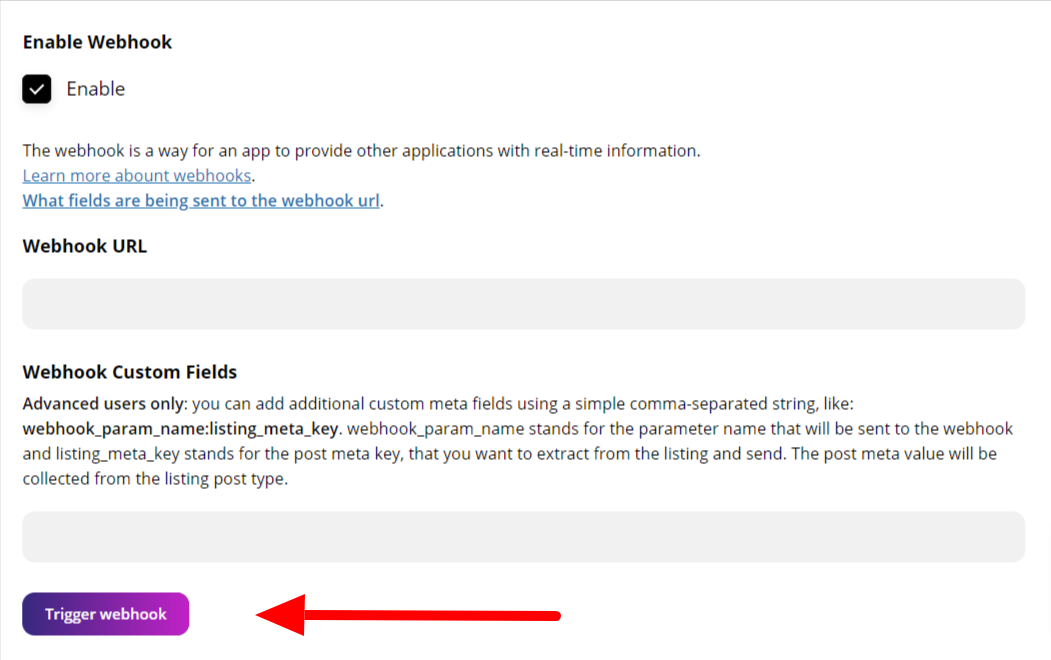
1. Go to your website, and inside the notification configuration, edit the notification you want to get integrated with Zapier. Enable the webhook using the checkbox.
2. Enter the hook you copied from Zapier
3. Save the changes, and click the button Trigger webhook. This sends the Webhook to Zapier, to confirm the hook we created.
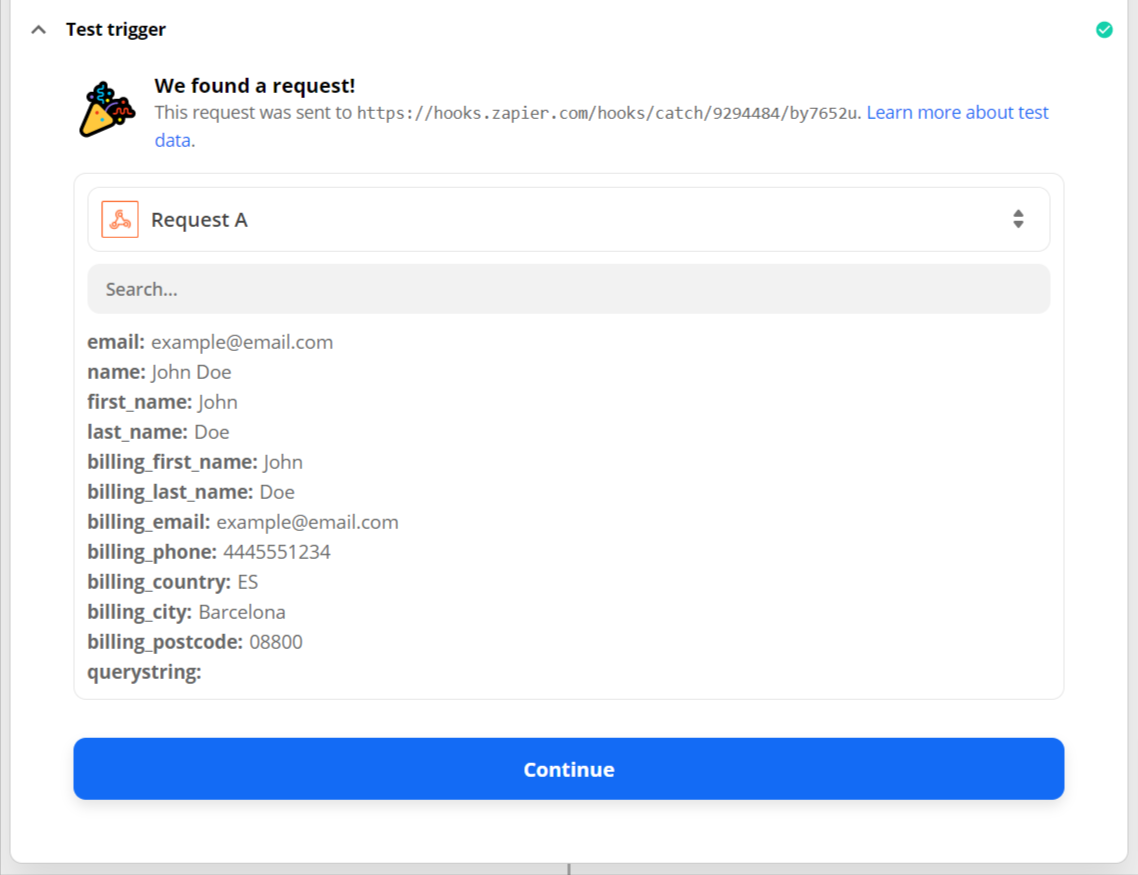
4. Back in Zapier, under Test trigger Requests, click the Load more button to refresh the requests and you should see a new entry.
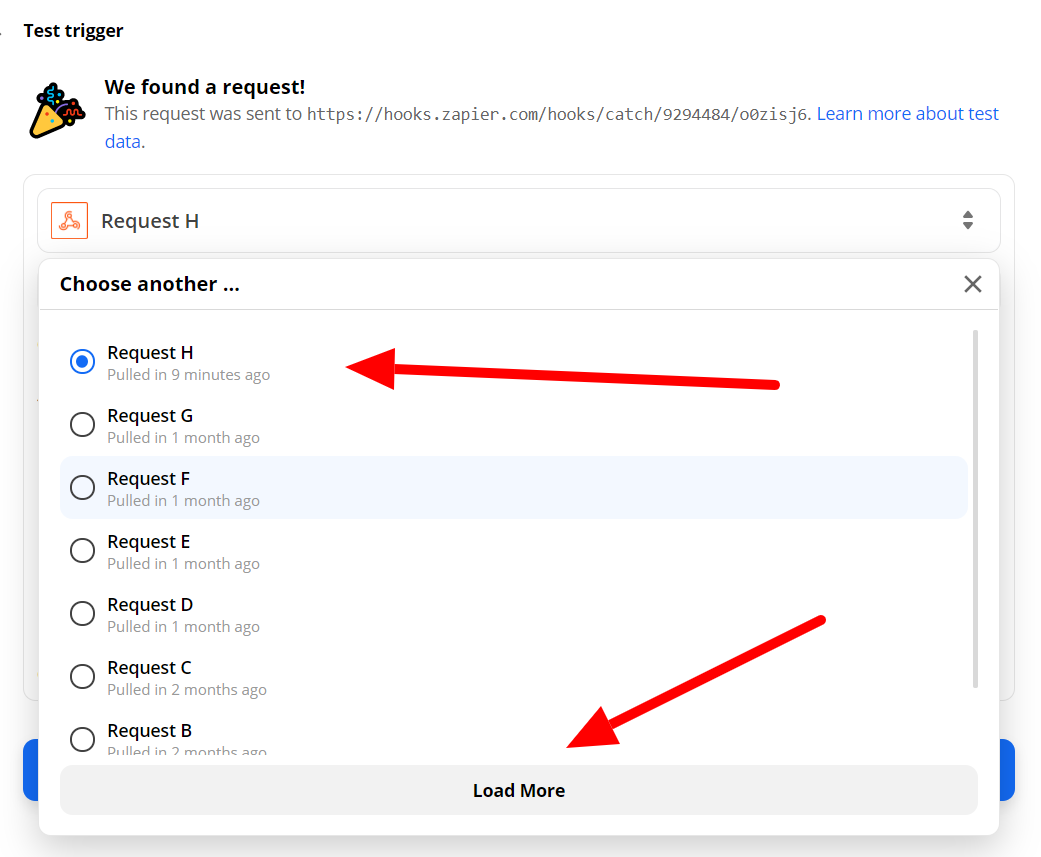
5. Click the new request and you should see all the parameters that we sent to the webhook.
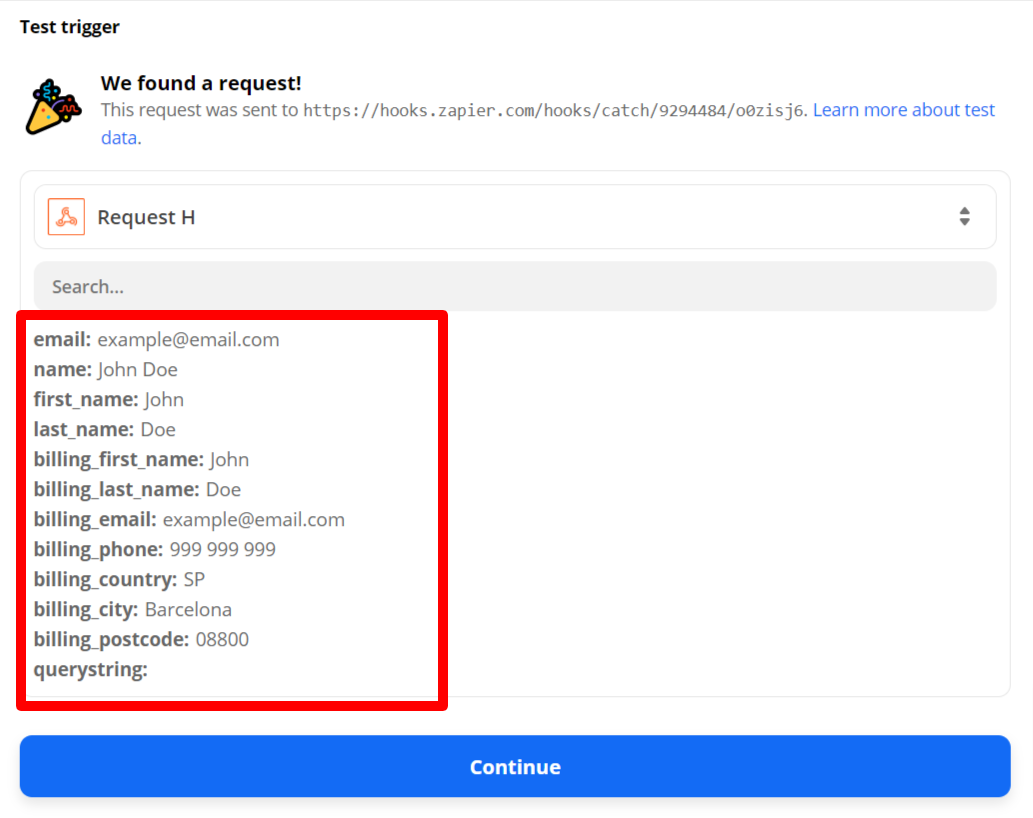
6. Click Continue
Create the Action that Zapier performs
Now you need to create the action that follows our trigger.
You can now choose one of the 1,000+ apps in Zapier. It could be a system for sending SMS messages, an email application, or anything else.

What pre-defined fields are being sent to the webhook URL.
Receiver
user_iduser_first_nameuser_last_nameuser_display_nameuser_emailuser_billing_emailuser_billing_phoneuser_billing_countryuser_billing_cityuser_billing_postcode
Sender
from_user_idfrom_user_first_namefrom_user_last_namefrom_user_display_namefrom_user_emailfrom_user_billing_phone
Listing
listing_idlisting_namelisting_url
Webhook custom fields
Advanced users only: you can add additional custom meta fields using a simple comma-separated string.
Example: webhook_param_name:listing_meta_key.
webhook_param_name stands for the parameter name that will be sent to the webhook and listing_meta_key stands for the post meta key that you want to extract from the listing and send. The post meta value will be collected from the listing post type.